How to connect to Apigee
On this page you will learn how to connect your Apigee Gateway to Boomi´s API Control Plane.
Prerequisites
To proceed, you will need the following:
-
A running instance of Boomi's API Control Plane.
-
Access to the instance of your Apigee Gateway.
-
Docker to utilize the image of our agent, which acts as an intermediary.
To get started, open your API Control Plane instance and follow the instructions below.
Add an Environment
-
Navigate to Environments in the menu on the left side.
-
Select the Register Gateway.
-
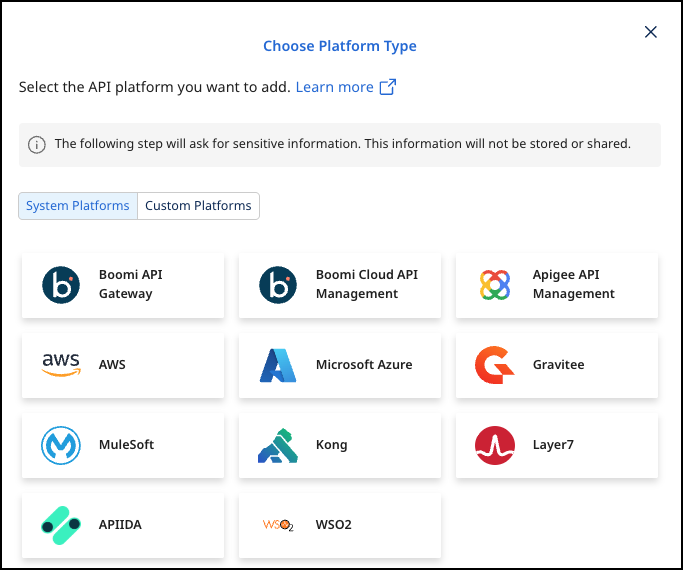
Select Apigee API Management.
Gateway Configuration
-
Add the following:
-
Gateway Name - Display name of your Gateway.
-
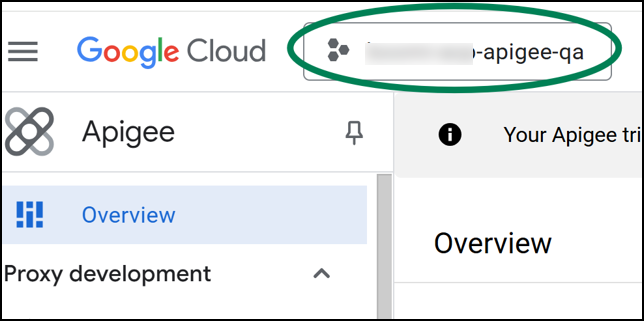
Organization - Your Apigee Organization is shown in the top left after logging in to Apigee
-
GoogleKey Filename: To obtain a key file:
-
Log into http://console.cloud.google.com/
-
Go to IAM & Admin → Service Accounts.
-
If necessary, create a new service account. Then click Manage Keys in the Actions menu for your service account.
-
Click ADD KEY → Create new key.
-
Choose JSON Format and save the generated key file.
-
-
Developer: This is the username of a developer that you have created in Apigee (under Publish → Developers). All Apigee Apps created by Boomi API Control Plane will use this Developer.

-
-
Select Next.
-
Select Download and Next. Your configuration file will download automatically.
Create an Agent as Intermediary
The following describes how to create a Docker container for the agent. It is described using a Docker compose file so that additional agents can be easily added to your docker stack later.
-
Docker Compose file options:
imageThe docker image of the API Control Plane Agentcontainer_nameYou can change the name of your Agent hereenvironmentbackendUrlThe agent will establish a web-socket to this URL and connect to your API Control Plane.agentTokengateway.typegateway.organizationgateway.googleKeyFilegateway.developergateway.gatewayEnvironments=test-env,prod-envList of environments
volumes
-
Run the following command:
docker compose up --pull always --detach
- The agent starts and connects automatically.
Check the Agent's Status
-
Go to your API Control Plane instance.
-
Select Environments in the menu on the left side.
- Your Agent should now be connected to API Control Plane
-
Click on the tile or the entry in the table to get more detailed information about the status of the connection. This can be very useful in case of an error.
You can now interact with your Gateways through Boomi's API Control Plane.
It is easy to add more agents Repeat the steps here or that of another gateway and add the agents to the existing Docker compose file.
